
MY TYPOGRAPHY


With college for the year now come to an end, I thought I would put a post together showing you what I do in my spare time and the creation process of my typography. I created this expression with Samantha Rose from The Sojournist in mind.
The little story of how I got started on my typography band wagon actually started because of college holidays. Naturally being a stress head, who constantly likes to remain busy it got to holidays where uni students around the world breathe a sigh of relief and hit the pillow for most of their days. I did do that for the first day I admit, but after day that I needed something to do asap between work. After studying a typography class a semester earlier I realised my passion for it, I decided to get back into it but this time without the computer.
I was always amazed by those with extreme hand craft skills and wanted to teach myself the skill of hand lettered typography. A few things I learnt quite quickly was that a) you can not do this stressed b) you can't drink too much coffee before doing it and c) it takes longer than you think.
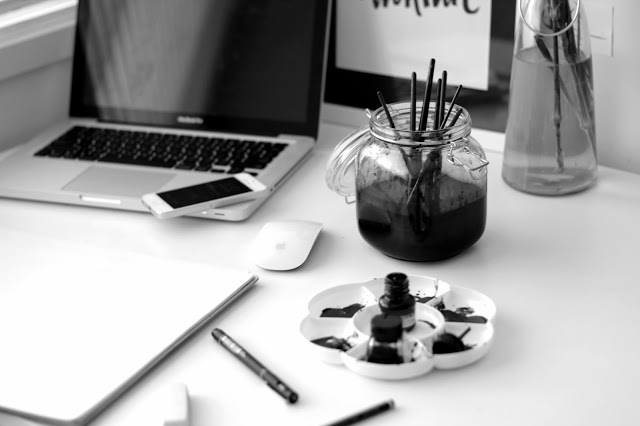
Anyway, I started off dabbling in a calligraphy-like treatment without calligraphy pens. Then later falling in love with ink. For those who ask what my tools of the trade are, they aren't anything fancy. All I use is: paper, indian ink / regular ink pot, a fine brush (I am not sure the type I use, I just picked the one that felt right?), pencil, eraser, oh and water.
Now that I am set, I am ready to create ..
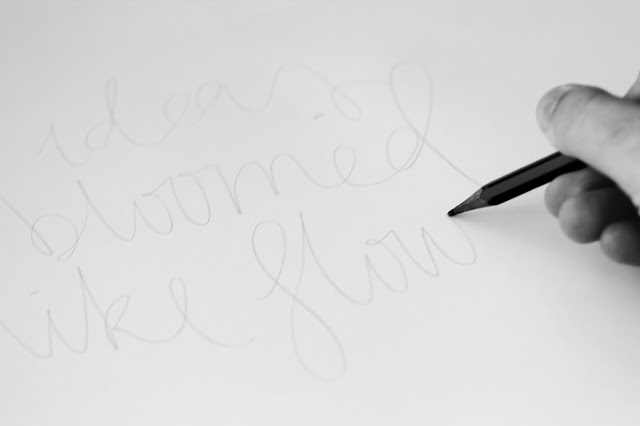
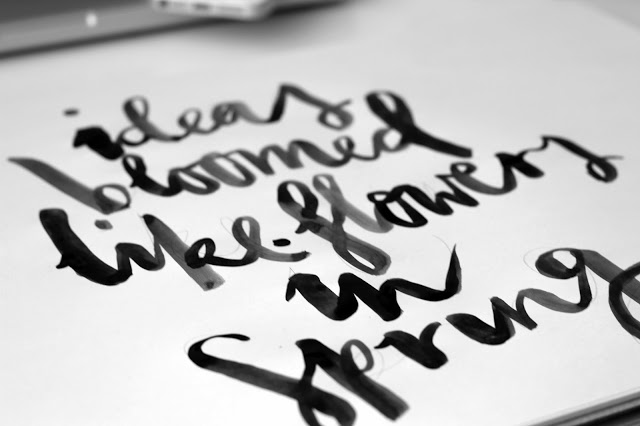
I start by picking an expression, I write it out in pencil making sure it all fits nicely for an A4 print. Personally my favourite thing about doing these, is that it is my own handwriting, that no one else has so try to make it yours as much as you can. After that I mix 2 parts water to 1 part ink into your palette. You can change this depending on if you want it really dark or light. Then I go over my writing, changing the pressure of my brush to paper making sure my brush is always wet. Once I am finished I leave it to dry before rubbing out the pencil underneath. To clean it up I then scan it onto my mac, then touch up the colour and line in Photoshop if I need to.
After it is printed it is into a frame or taped to the wall surrounded by other treasures and of course flowers! Can't wait to see how Sam styles this beauty in her own space. Her post will be up in the next week.
After it is printed it is into a frame or taped to the wall surrounded by other treasures and of course flowers! Can't wait to see how Sam styles this beauty in her own space. Her post will be up in the next week.
I have created some exclusive limited edition prints that are now available at Molten Store & remember to keep checking out my typography for A Pair & A Spare's Do What You Love Series.
jasmine x